Leisure
Travelflow Integration Guide
Step-by-step instructions to aid you in integration
Introduction
The Travelflow Web Booking Engine is a ready-to-go booking solution that can be implemented into any website with ease. That means, no need to redesign your website and no hassle.
Your web developer can implement the booking engine into your site following our step-by-step guide, or alternatively, our in-house team can incorporate it into your site for a small fee.
Looking for the B2B / Corporate guide?
Table of Contents
Add the booking engine to your website
The Travelflow Web Booking Engine can be implemented into your site in just a few simple steps:
Step 1: Position the booking engine
Copy and paste the HTML shown to the right into the position where you would like the booking engine to appear on your web page.
If you are using a CMS such as WordPress or similar you can add this code through the built in page editor.
Before saving any changes remember to make sure that :
https://example.travelflow.co.uk/withindata-ibe-urlis replaced with your Booking Engine URL.- The
bnattribute denotes the branch number you wish to load onto your web page. If you only have a single branch, thebnattribute can be safely omitted.
The
data-ibe-urlattribute can be customised to show different aspects of the booking engine.
Step 2: Initialise the booking engine
Add the following JavaScript code to your page just before the closing </body> tag.
This can be added directly to the page within a </script> tag or included in a separate .js file depending on how your website has been set up.
Before saving any changes remember to make sure that :
https://example.travelflow.co.uk/is replaced with your Booking Engine URL.
Please contact our Customer Support team at support@billian.co.uk if you haven’t already received this via e-mail.
Only one copy of the integration script is required for any number of booking engines on a single page.
Additional Customisation
The further customisation options below are entirely optional and provide additional functionality for the display of the booking engine.
Set the selected tab
While you can set the default tab for the booking engine within Flight Deck, you may wish to have the booking engine appear within your page and select a tab other than the default.
To do this you can modify the code from step 1 with a query parameter.
See the example to the right for a modifed version of the code from step 1.
?searchtype=hotel to the end of the data-ibe-url
attribute.
In this example the tab that contains the hotel search form would be selected (if the tab was present).
Similar options are available for the following:
- Flights -
?searchtype=flight - Hotels -
?searchtype=hotel - Cars -
?searchtype=car
Implement the results page
Step 1: Create a results template
Searches made through the booking engine generate results that can appear on a separate page to match the look and feel of your website.
To implement this you will need to provide a simple results template for the booking engine to use.
The results page should only serve to display results from the booking engine, and should consist of a header, a footer and no body content whatsoever.
The results page should be directly accessible from any internet browser, even though it may not be linked to your website.
See the next step for example code.
Example of a results template. View it here.
Step 2: Adding the template tag
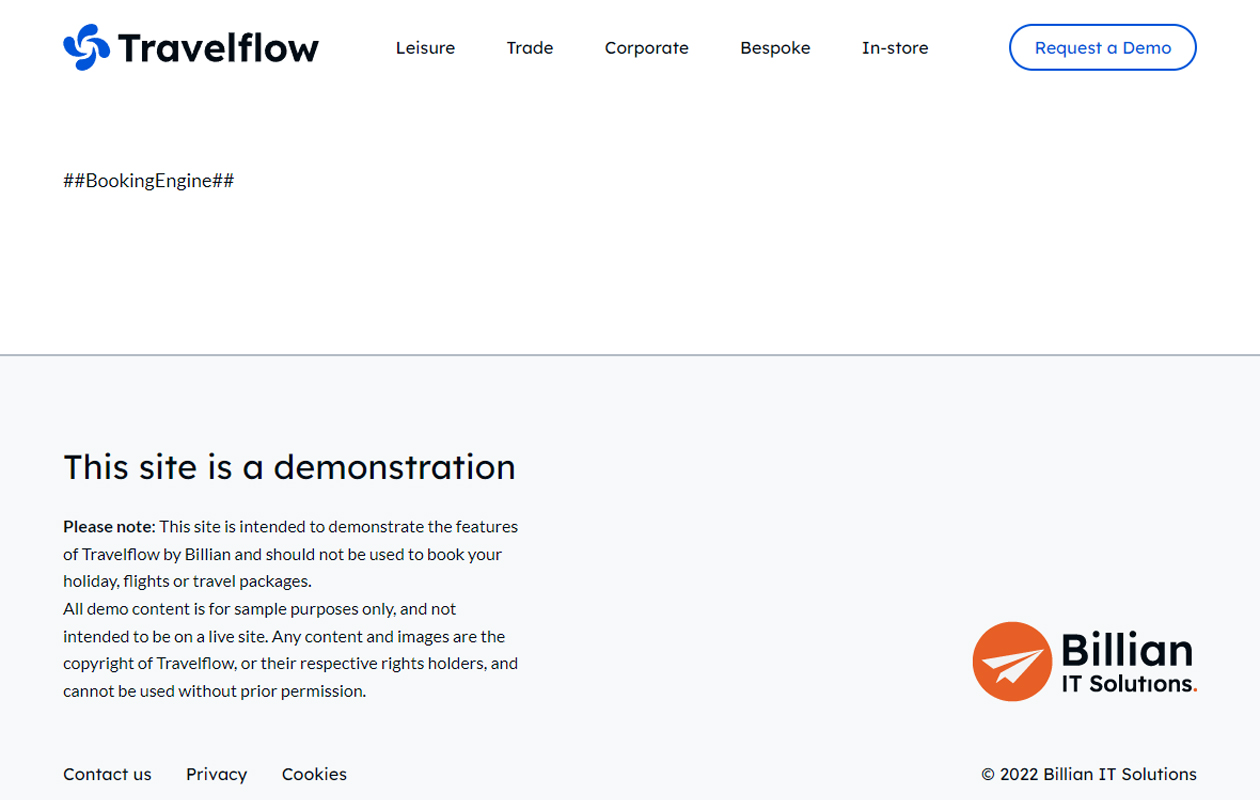
Add your template tag to the main content, as shown.
The template tag is mandatory because this is what’s targeted and replaced by the Travelflow Web Booking Engine to display results.
Shown here is example code of a results page - (your page will likely be more complex)
Note:
##BookingEngine##is the default template tag and can be changed to anything you like, as long as it is mirrored in Flight Deck.
Configure Flight Deck
Flight Deck is your Web Administration tool for the Travelflow Web Booking Engine.
Contact our Customer Support team at support@billian.co.uk to be provided with a URL and credentials for Flight Deck, if you don’t already have this information.
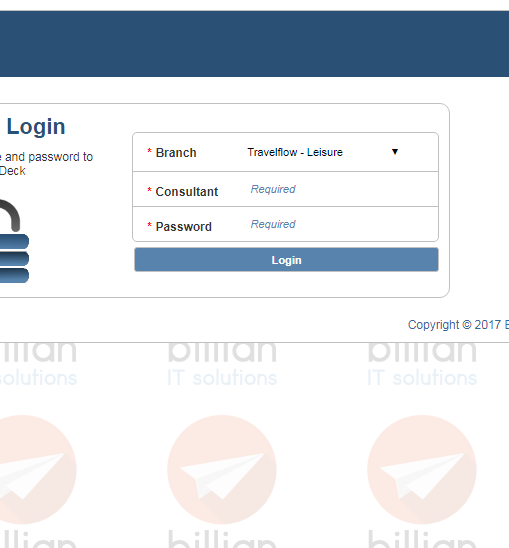
Step 3: Login to Flight Deck
- Navigate to your Flight Deck URL.
- Login using the username and password you have been provided with.
Note: If you have multiple branches you will be given the option to select a branch on the login page.
Contact our Customer Support team at support@billian.co.uk if you are missing any of this.
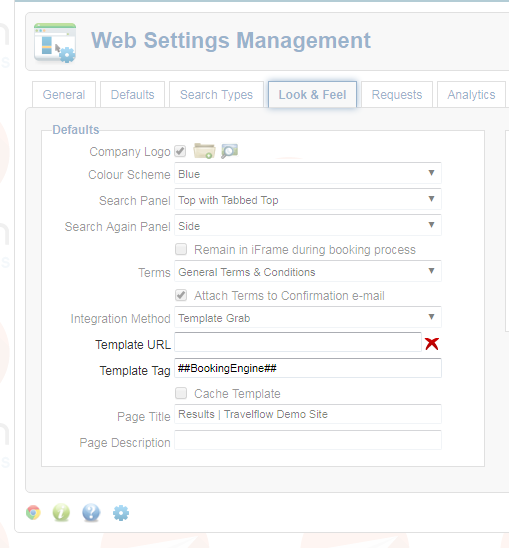
Step 4: Add your results template URL into Flight Deck
Once logged in, from the dashboard navigate to "Web Settings" and click on the "Look & Feel" tab.
- Enter the URL for the results page into the "Template URL" field.
- Enter the template tag you added to your template in the "Template Tag" field.
- Save the changed settings.
Note: You can save changes to any page in Flight Deck by clicking the green tick button in the top right of the page.
Once this has been completed, any new searches performed on the Travelflow Web Booking engine will appear contained in your results template.
Any issues with how the template looks after perfoming a search can usually be solved by clearing the template cache. To clear the template cache you can click the red "X" icon next to the "Template URL" field in Flight Deck.
Implement special offers
Special offers be implemented into your site in just a few simple steps:
Special offers can be setup on a per branch basis in Flight Deck.
Contact our Customer Support team at support@billian.co.uk to be provided with a URL and credentials for Flight Deck, if you don’t already have this information.
Step 1: Position the special offers
Copy and paste the HTML shown here into the position where you would like the special offers to appear on your web page.
If you are using a CMS such as WordPress or similar you can add this code through the built in page editor.
Before saving any changes remember to make sure that :
https://example.travelflow.co.uk/is replaced with your Booking Engine URL.
The
data-ibe-urlattribute can be customised to show different layouts and types of special offers.
Step 2: Customise the special offers display
The HTML provided in step 1 contains placeholder information that will need to be replaced to contain real world values to display special offer content.
Here, in the updated example, [SPECIAL-OFFERS-LAYOUT] has been replaced with
SB-regionoffersembedded.html & [SPECIAL-OFFERS-GROUP-CODE] has been
replaced with the special offer group code AFRI.
Depending on what special offer groups you have setup in Flight Deck,
AFRImay need to be changed to a valid special offer group code.
More information on available customisation options are listed below.
Step 3: Customise the special offers layout
To change the layout of the special offers on your website you will need to change the
[SPECIAL-OFFERS-LAYOUT] placeholder in the code example from step 1 to one of the following options.
SB-RegionOffers.htmlSB-RegionOffersEmbedded.html
Additional layout options are added periodically. The list above will be updated to include new options.
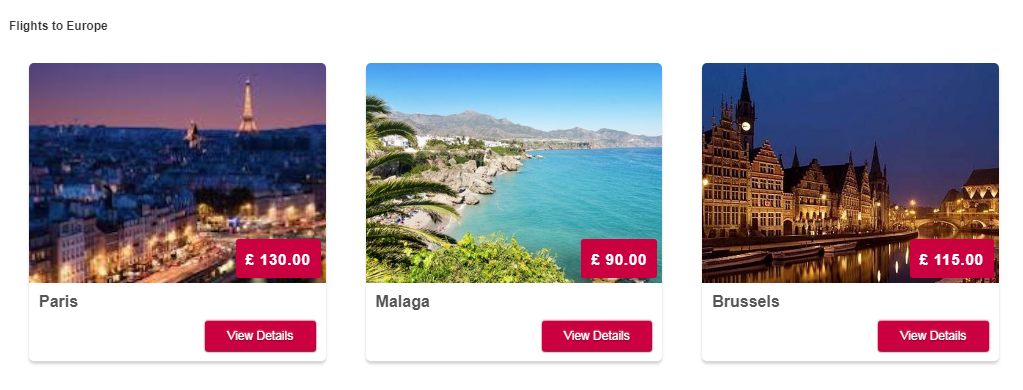
Example of SB-RegionOffers.html
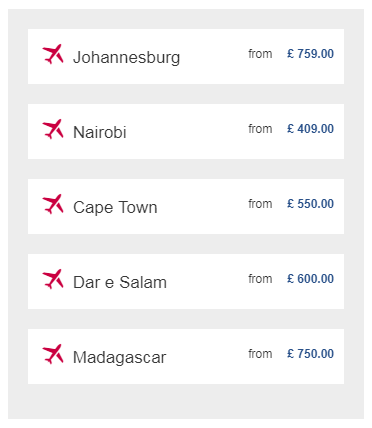
Example of SB-RegionOffersEmbedded.html
Step 4: Special offer group code
To change the content of the special offers displayed on your website you will need to change the
[SPECIAL-OFFERS-GROUP-CODE] placeholder in the code example from step 1 to one of the special offer groups you have setup in flightdeck.
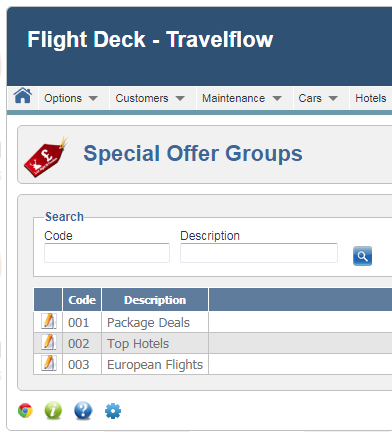
Once logged in to Flight Deck, navigate to the following page from the menu:
- Settings > Special Offers > Groups
If there are any special offer groups set up they will be listed here.
Copy the value from the "Code" column of the displayed table and replace the
[SPECIAL-OFFERS-GROUP-CODE] placeholder in the code example from step 1.
Step 5: Initialise the special offers
Add the following JavaScript code to your page just before the closing </body> tag.
This can be added directly to the page within a </script> tag or included in a separate .js file depending on how your website has been set up.
Before saving any changes remember to make sure that :
https://example.travelflow.co.uk/is replaced with your Booking Engine URL.
Please contact our Customer Support team at support@billian.co.uk if you haven’t already received this via e-mail.
If you are displaying the special offers on the same page as the booking engine, then only one copy of the integration script is required for both the booking engine and the special offers.
Only one copy of the integration script is required for any number of special offers on a single page.
Recommendations
Listed below are some recommendations that can help with the integration of the booking engine into your results template.
Simplify the the results template
To minimise any possible conflicts between the booking engine and your template, avoid using unnecessary scripts, libraries, forms or analytics code where possible.
- If possible, try to use absolute paths for any images, links or external files on the page containing the
##BookingEngine##tag. - Travelflow has elements that make use of the full screen space. Provide the booking engine with the maximum amount of space possible by removing unnecessary margins and padding around the
##BookingEngine##tag.
Note: If you use a CMS (such as Joomla! Or Wordpress) there are plug-ins available to allow you to disable the built-in scripts / javascript libraries on certain pages.
CORS (cross-origin resource sharing)
After implementing the results page, icons from your template page may not display correctly after performing a search on the booking engine.
This is not unexpected and is due to how web browsers handle certain file requests. For more information and how to resolve this, read below.
Understanding CORS
The same-origin policy is an important security concept implemented by web browsers to prevent certain code from making requests against a different origin (e.g. a different domain) than the one from which it was served.
A request for a resource (like an image or a font) from one website to another website is known as a cross-origin request. CORS (cross-origin resource sharing) manages these cross-origin requests.
Although the same-origin policy is effective in preventing resources from different origins, it can also prevent legitimate interactions between a server and clients of a known and trusted origin.
Cross-Origin Resource Sharing (CORS) is a mechanism that uses additional HTTP headers to tell a browser to relax the same-origin policy so that a web application running at one origin (domain) can have permission to access selected resources from a server at a different origin.
How do I implement CORS?
Unfortunatly there is no single solution to this, and implementing the request headers to set up CORS correctly depends on the language and framework of your backend solution.
For example, if you are using an Apache web server with WordPress for your website, this could be a
simple as adding the following line to your sites .htaccess file.
Note: Typically the
.htaccessfile will be in located in your websites root directory.Locations can vary from host to host. If in doubt, contact your hosting provider.
Once the correct request headers have been set on your server any icons from your that couldn't be displayed should work correctly after refreshing the page.
For other configurations, a great resource is the Enable CORS site which has more information on how to setup CORS.
Support
If you are having any issues implementing any of the steps here, contact our Customer Support team at support@billian.co.uk.
We also offer an integration service where our in house developers work closely with your team to integrate the Travelflow Web Booking Engine into your site, for more information, get in touch.